
How to Hand-Letter Baby Shower Cookies
Rated 5.0 stars by 1 users
In this tutorial, you'll learn how to hand-letter with royal icing on a cookie using just an edible marker and tissue paper. If you'd like to learn more, we also recommend checking out this step-by-step tutorial for hand-lettering on cookies.
Ingredients
-
Oval Plaque Cookie Cutter
-
Leaf Green Gel Food Coloring
-
Bright White Gel Food Coloring
-
Royal Icing
-
Piping Bags
-
Tissue Paper
-
Edible Marker
Directions
First, ice your cookie with royal icing. We mixed leaf green with bright white royal icing to create a soft green color. For this method to work, the icing on the cookie must be fully dried before lettering.
Print out the lettering you would like to put on your cookie. Ensure that the lettering will work in proportion to the cookie.
Lay your tissue paper over the print-out, and carefully trace over the lettering using an edible marker.
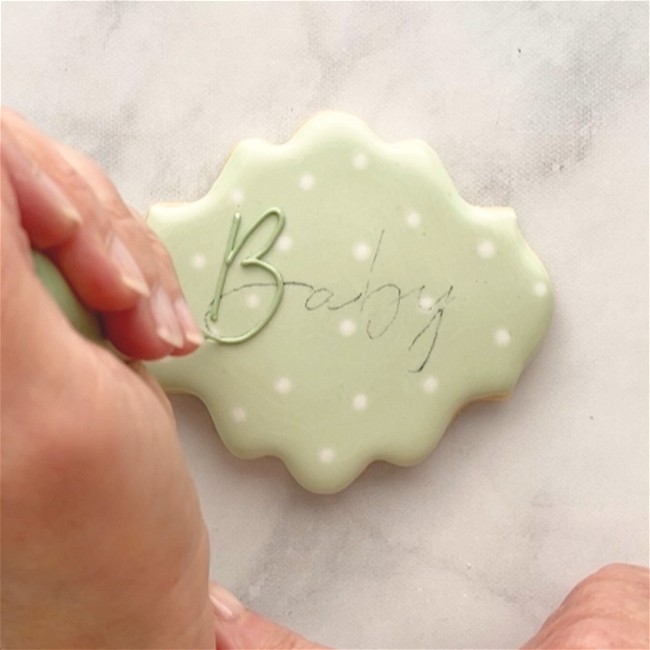
Lay the tissue paper with the lettering on it on top of the cookie. Trace the lettering with your edible marker. The ink will bleed through the tissue paper, creating a guide for when you are ready to pipe your lettering. Be sure not to move the tissue paper during this step.
Once you have traced the letters, gently lift the tissue paper up. You will see the outline of where the ink bled through.
Pipe your text onto the cookie, using your edible ink base as a guide.
Recipe Video
Recipe Note
Cookie decorated by Mary, aka The Flour Gardener.
