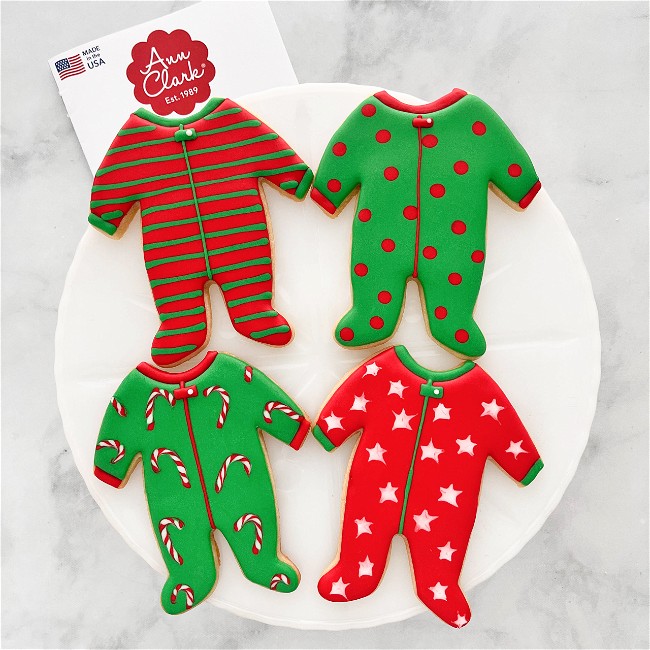
Matching PJs for Christmas: Candy Cane Pajama Tutorial
Make these adorable footie pajamas to go with your family's matching PJ tradition for Christmas. To get this candy cane pattern, we used a wet-on-wet technique. By adding patterns while the base icing is still wet (hence wet-on-wet) the pattern blends into the base, and you can also use a scribe tool or sharp toothpick to drag icing colors around to create patterns like the candy canes shown.
We recommend baking a few sacrificial cookies to practice on, as it takes a steady hand a bit of practice to master this technique. However, once you get it, it goes quickly and is a super fun way to add some holiday flair to any shape.
Matching PJs for Christmas: Candy Cane Pajama Tutorial
Rated 5.0 stars by 1 users
Category
Tutorials
Make these adorable footie pajamas to go with your family's matching PJ tradition for Christmas. To get this candy cane pattern, we used a wet-on-wet technique. By adding patterns while the base icing is still wet (hence wet-on-wet) the pattern blends into the base, and you can also use a scribe tool or sharp toothpick to drag icing colors around to create patterns like the candy canes shown.
We recommend baking a few sacrificial cookies to practice on, as it takes a steady hand a bit of practice to master this technique. However, once you get it, it goes quickly and is a super fun way to add some holiday flair to any shape.

Ingredients
-
Pajamas Cookie Cutter
-
5 Tipless Piping Bags
-
Leaf Green Food Coloring
-
Super Red Food Coloring
-
Bright White Food Coloring
-
A scribe tool or very sharp toothpick
Directions
Bake and cool cookies before decorating. Try Ann Clark's no-fail sugar cookie recipe. Alternatively, you can create a decadent spread with our Chocolate Peppermint cookie recipe. Make sure cookies are fully cooled. If they are warm, the icing will run off of them. Make royal icing.
Prepare the following icing colors:
Detail Consistency:
Green
Red
Flood Consistency:
Green
Red
WhiteOutline the entire cookie in green detail consistency icing. Be sure to leave some space at the cuffs of the sleeves and the collar of the pajamas, as we will be adding detail there later.
Fill the outlined space with green flood consistency icing. Use a toothpick or scribe tool to move the icing around, ensuring full coverage and popping any air bubbles.
The next steps must be done while the icing is still wet, so move quickly through Step 7.
Using red flood consistency icing, pipe small dots in the shape of Js (or candy canes) throughout the pajamas. Have fun with this--make them face different directions, and pipe them at an angle. Leave space between each red dot for the white dots.
Using white flood consistency icing, pipe small white dots between the red dots. Move quickly to the next step.
Using a scribe tool or sharp toothpick--you want something with a very sharp point so that you can be as accurate as possible--gently outline each candy cane.
Start at the base of one side, then gently drag your scribe up and over the curve and around the other side of the candy cane, ending where you started. By doing this in one fluid motion and going up one side and down the other, you'll get the classic curved stripes of a candy cane. This step needs to be done while the base and the candy cane dots are wet so that the icing moves freely.
Once you are done making all of your candy canes, let this layer of icing crust over for about 10-15 minutes.Now time for the details! Use your red detail consistency icing to add cuffs to the sleeves, a collar, and a neat clasp at the top of the pajamas.
Recipe Video
Recipe Note
Cookies decorated by Mary Mansfield of The Flour Gardener


