
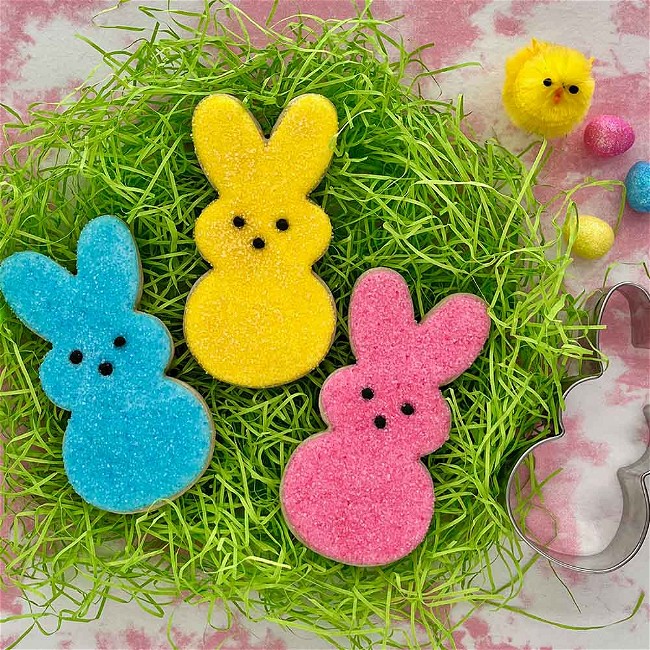
Decorating Tutorial: Easy Marshmallow Easter Bunny Sugar Cookies
Rated 5.0 stars by 1 users
Category
Tutorials
Ingredients
-
Ann Clark's Sugar Cookie recipe.
-
Sanding Sugar
-
Royal Icing
-
Food Coloring
Directions
First, make Ann Clark's Sugar Cookie recipe.
Next, make your own sanding sugar, using colors that you feel are appropriate. For a marshmallow bunny look, we like pink, yellow, and blue.
Next, make a batch of royal icing. Add food coloring to the royal icing--in the video below, we used Bubblegum Pink food coloring.
With a firmer royal icing, pipe around the outlines of your bunny. The icing should be roughly the consistency of toothpaste. We found it easiest to do the bunny in three sections.
Next, add water to your royal icing one teaspoon at a time until it is about the thickness and viscosity of shampoo.
Use the thinner royal icing to flood inside the boundaries you created with the first batch of royal icing. To ensure an even flood, use a toothpick to move the icing around until the entire cookie surface is covered.
While the flooded area of the cookie is still wet, lightly sprinkle your colored sanding sugar on the cookie until desired texture is reached.
Using a toothpick, make three indentations--two eyes and one nose
Using black royal icing and a fine-tipped piping bag, fill the nose and eye indentations you just made.
