Decorating a Witch Hat Cookie for Halloween
Category
Tutorials
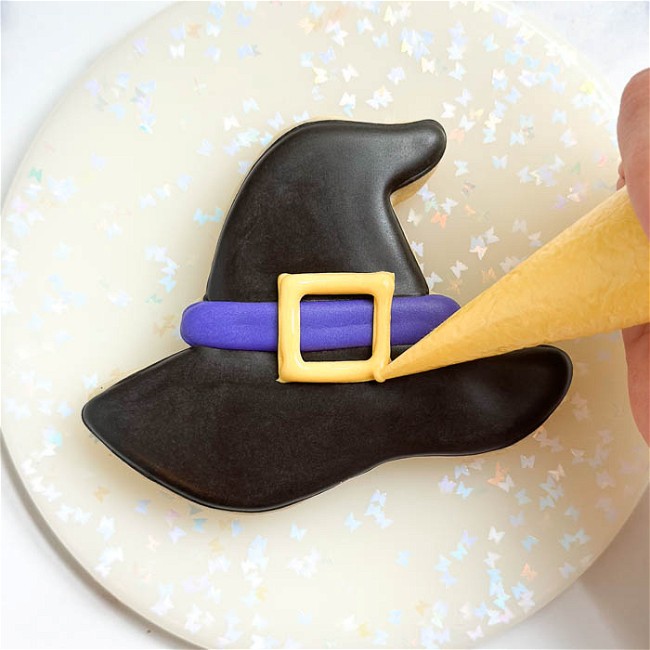
We are all about treats for Halloween! These witch hat cookies are a sweet addition to any trick-or-treater's basket!
Ingredients
-
Witch Hat Cookie Cutter
-
5 Tipless Piping Bags
-
Super Black Food Coloring
-
Regal Purple Food Coloring
-
Lemon Yellow Food Coloring
- Spatulas & pint glasses to fill your piping bags
- Scissors
Directions
Bake and cool cookies before decorating. Get Ann Clark's no-fail sugar cookie recipe here. Or, lean in to the fall flavors with this delicious Pumpkin Spice Cookie recipe. Make sure cookies are fully cooled. If they are warm, the icing will run off of them. Make royal icing. Learn how to mix different consistencies of royal icing here>>
Prepare the following icing colors:
Piping Consistency:
Black
Purple
Yellow
Flood Consistency:
Black
Purple
- Using the purple detail consistency icing, outline the middle section of the witch hat, as shown in the photo. This will be the hat band.

Pipe a squiggle of the purple outline consistency icing in the middle of the section. Let the outline dry for a few minutes before moving onto the next step.
Pro Tip: Piping a squiggle of detail consistency royal icing in the middle of small flood sections of a cookie help with creating a "puffy" look, more definition between sections, and helps to prevent craters (or holes) that sometimes occur in flood icing as it dries.
Flood the middle section with purple flood consistency icing and use a scribe tool to smooth out any lumps and pop any bubbles that come to the surface. You can use a toothpick in lieu of a scribe tool.
Let this section crust over for 20-30 minutes until just crusted over before moving onto the next step. You can place your cookies under a fan to speed up the drying process.
- Using the black outline consistency icing, outline the outer two sections of the witch hat.
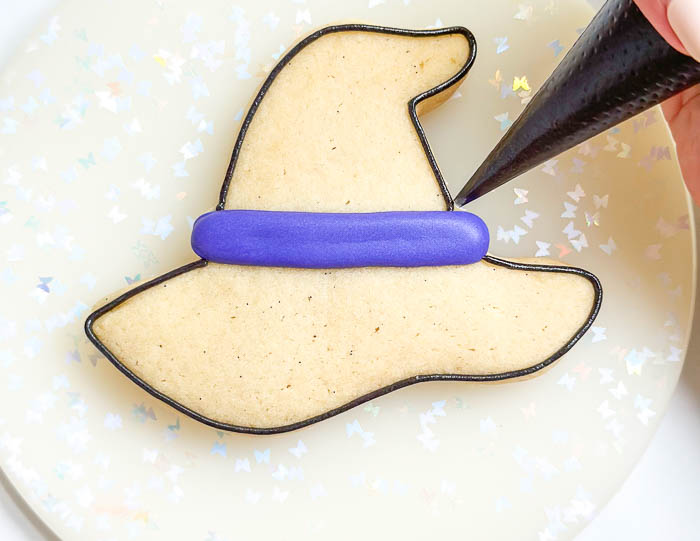
Flood the outer two sections with black flood consistency icing. Let the icing dry for 60-90 minutes until well crusted over before moving on to the next step. You can place cookies under a fan to expedite the drying process.
Pro Tip: Black icing is more prone to color bleed, which is when the darker icing "bleeds" or runs into lighter sections. It's ideal to let sections with black icing dry as much as possible before piping other, especially lighter, colors of icing next to or on top of black royal icing.
Another way to reduce the risk of color bleed with black royal icing is to avoid over saturating the icing with black gel color. Instead, try to color the icing to a dark gray only, knowing that color develops over time, even as the icing dries.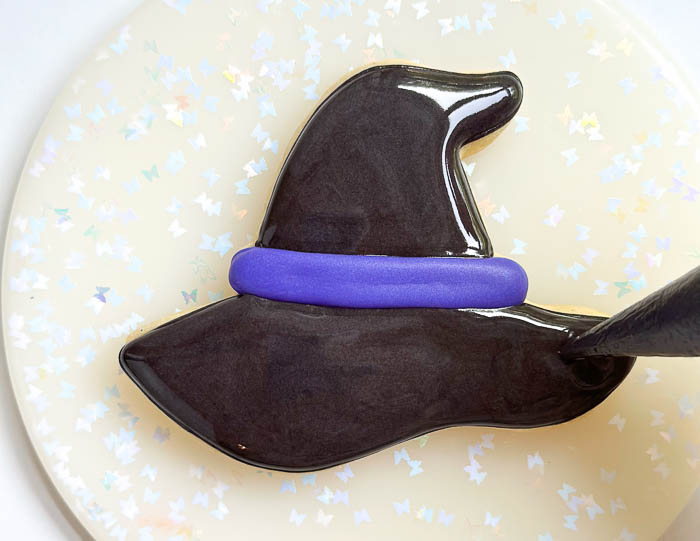
- Outline the buckle of the witch's hat with the yellow detail consistency icing. Let the outline dry for a few minutes before moving onto the next step.
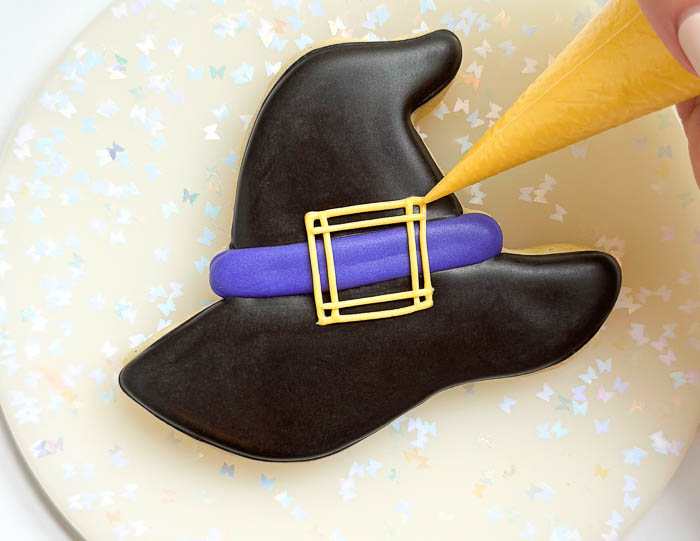
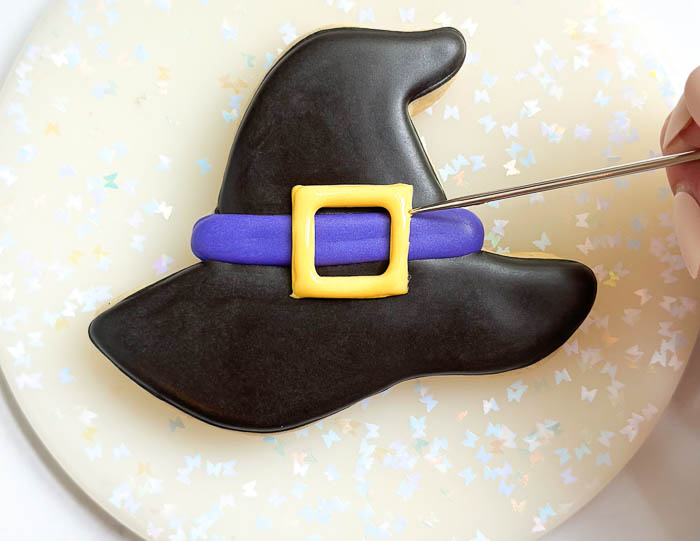
- Using the yellow detail consistency icing, fill in the outlines sections of the buckle.
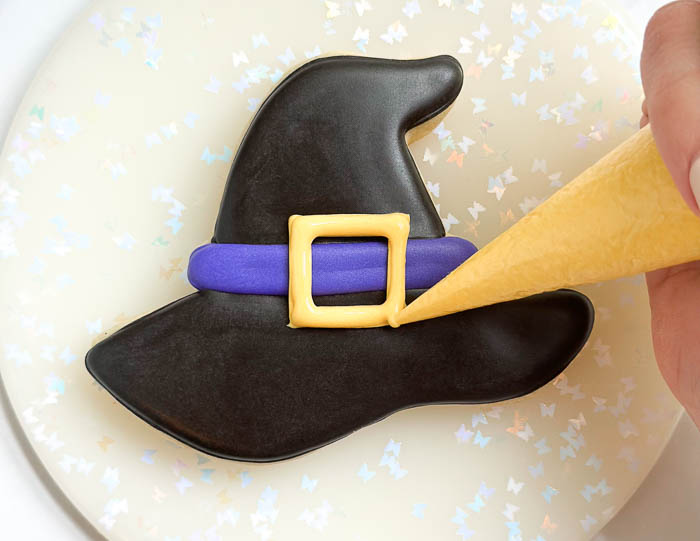
Smooth out the icing with your scribe tool or toothpick.
Recipe Video
Recipe Note
Cookies decorated by Laura Luk of Butterfly Bakes Atlanta


