
Classic Butterfly Sugar Cookie Decorating Tutorial
Rated 5.0 stars by 1 users
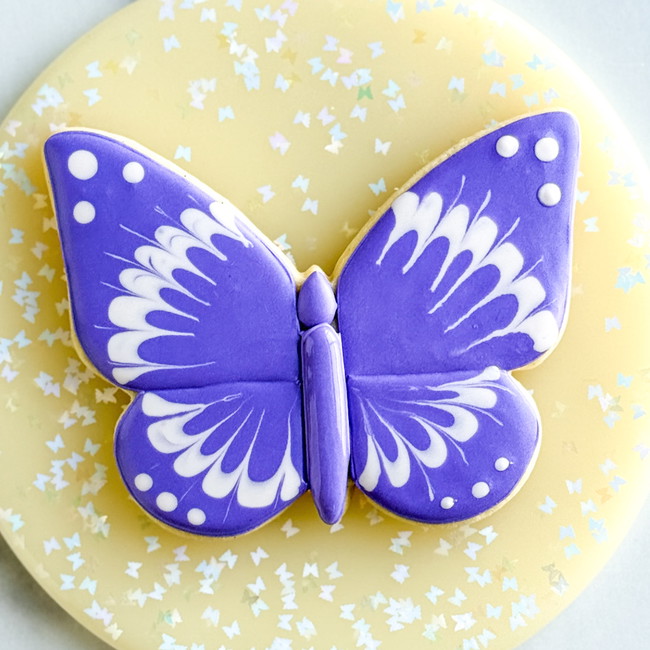
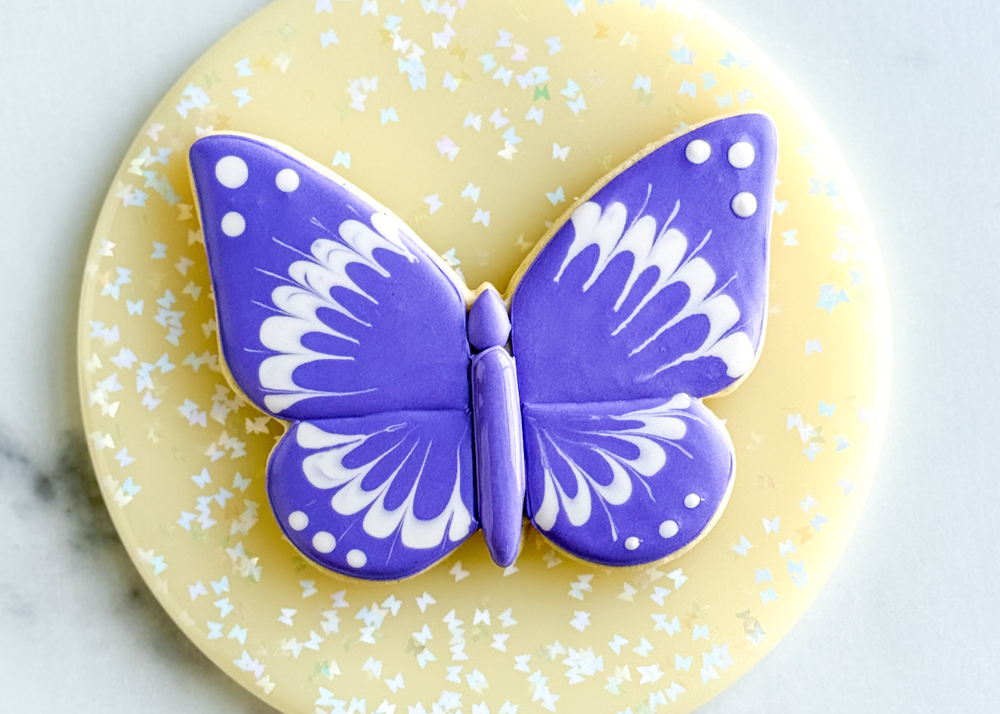
You'll fly through decorating these cookies! This design gives us all the flutters and feels - and it's so simple to do! Try it out with different colors for a visually stunning dessert spread
Ingredients
-
Butterfly Cookie Cutter
-
Piping Bags
-
Regal Purple Food Coloring
-
Bubblegum Pink Food Coloring
-
Parchment Paper
-
Thingamagenie (or a sharp toothpick)
Directions
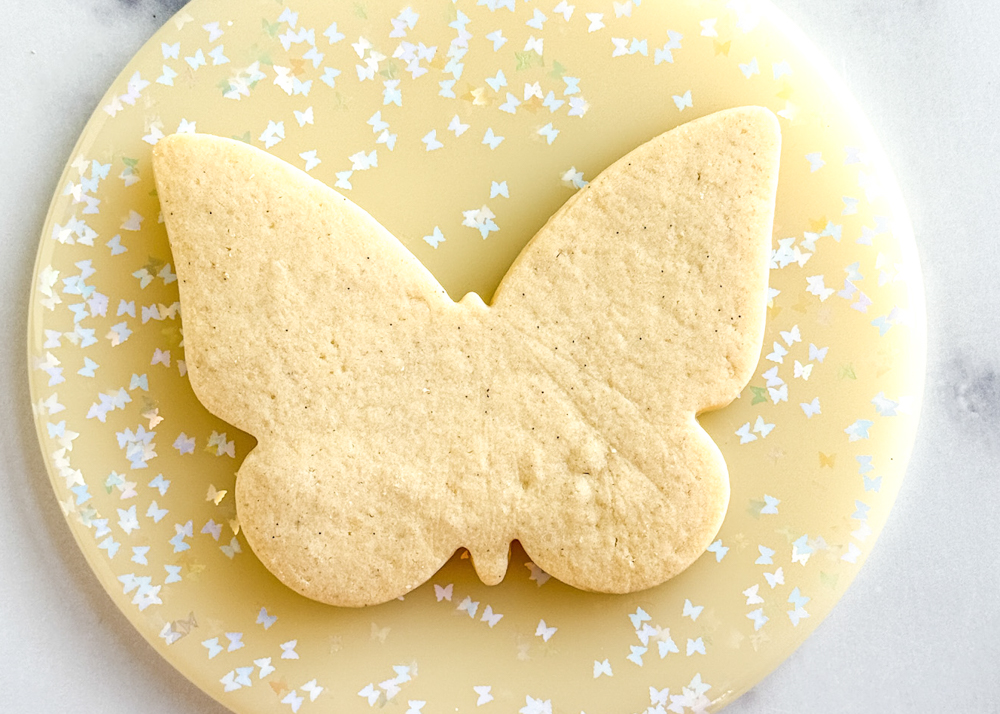
Bake and cool cookies fully before decorating. Prepare royal icing in the following colors and consistencies:
Outline/Piping Consistency:
Purple
Flood Consistency:
Purple
Light Pink
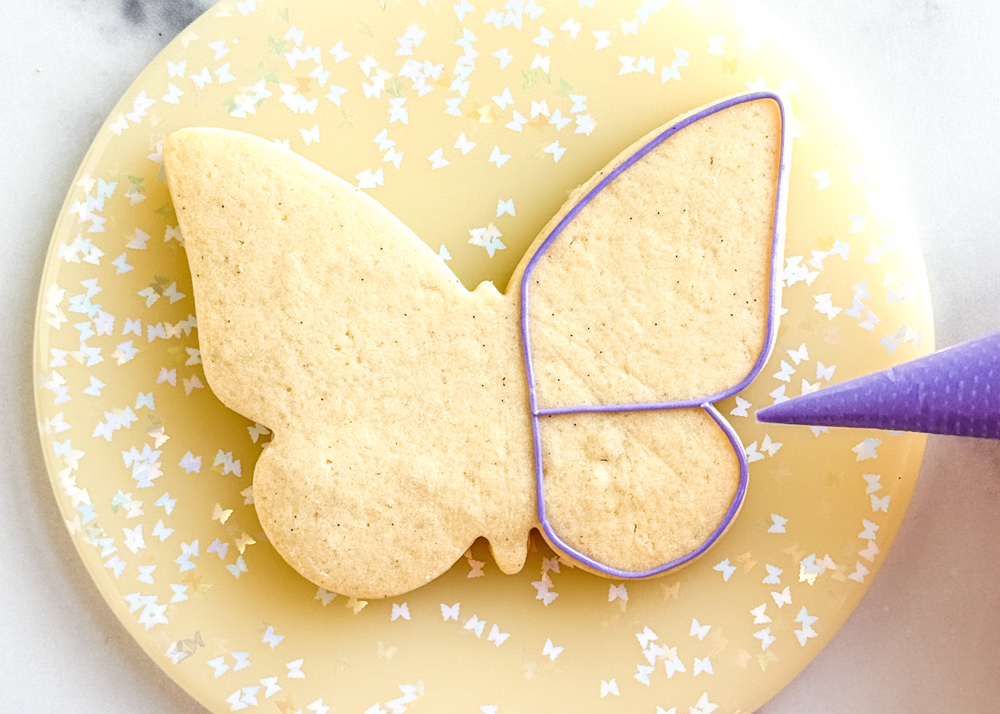
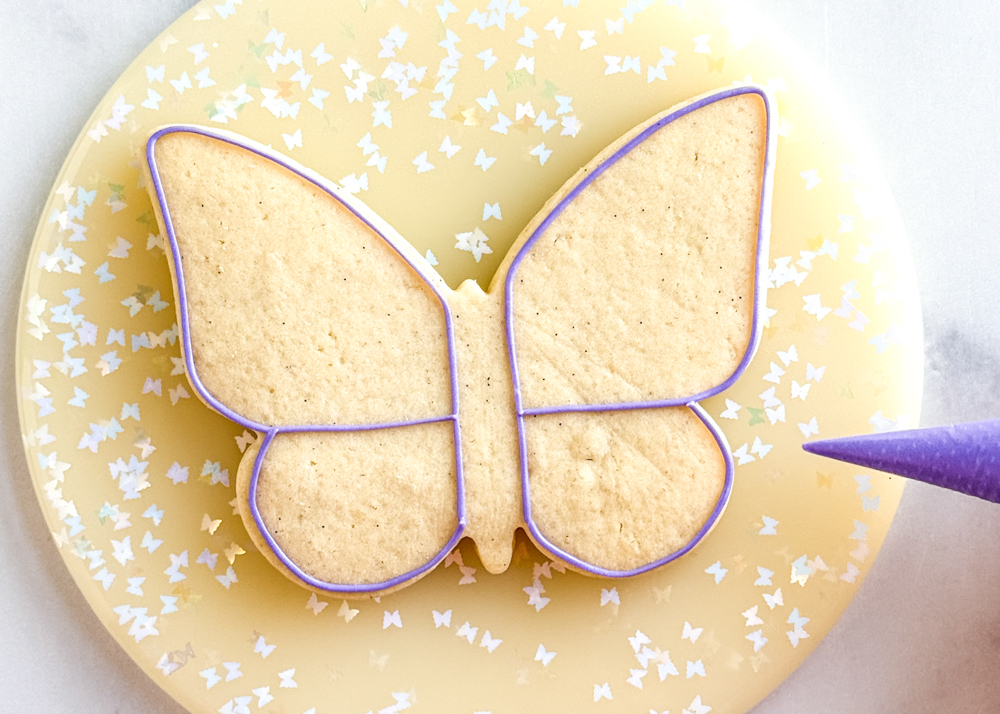
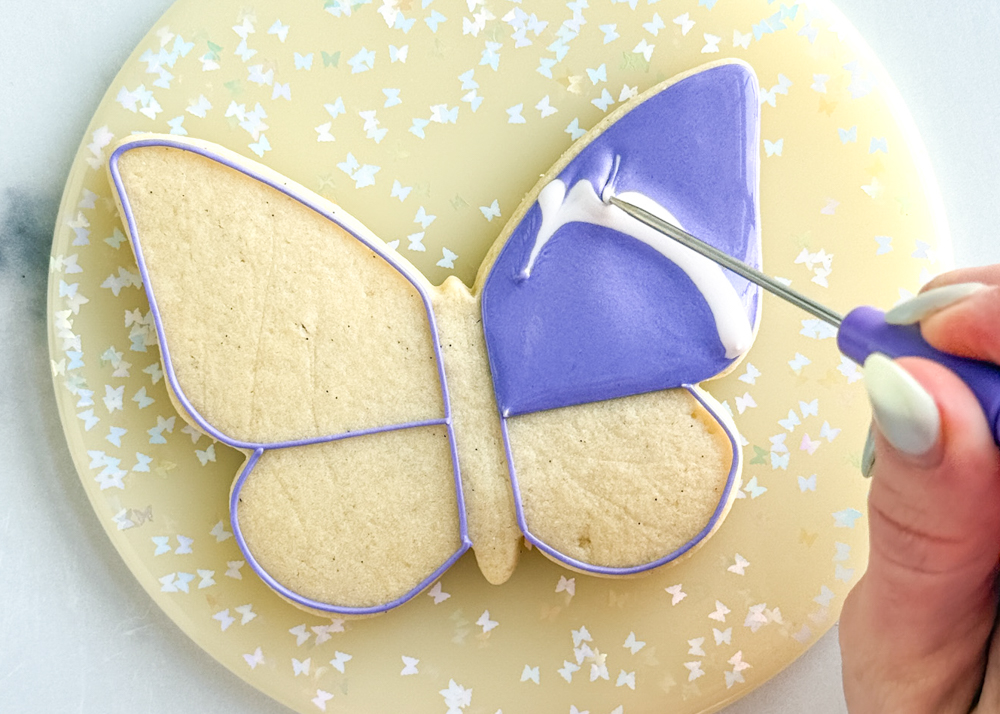
Using the purple outline consistency icing, outline the butterfly wing sections, as shown in the photo.
Pro Tip: We will be using a wet-on-wet technique for this step, so please read the instructions in their entirety before beginning. You will need to move quickly, not stopping in between steps, in order to achieve this design before the icing starts to dry.
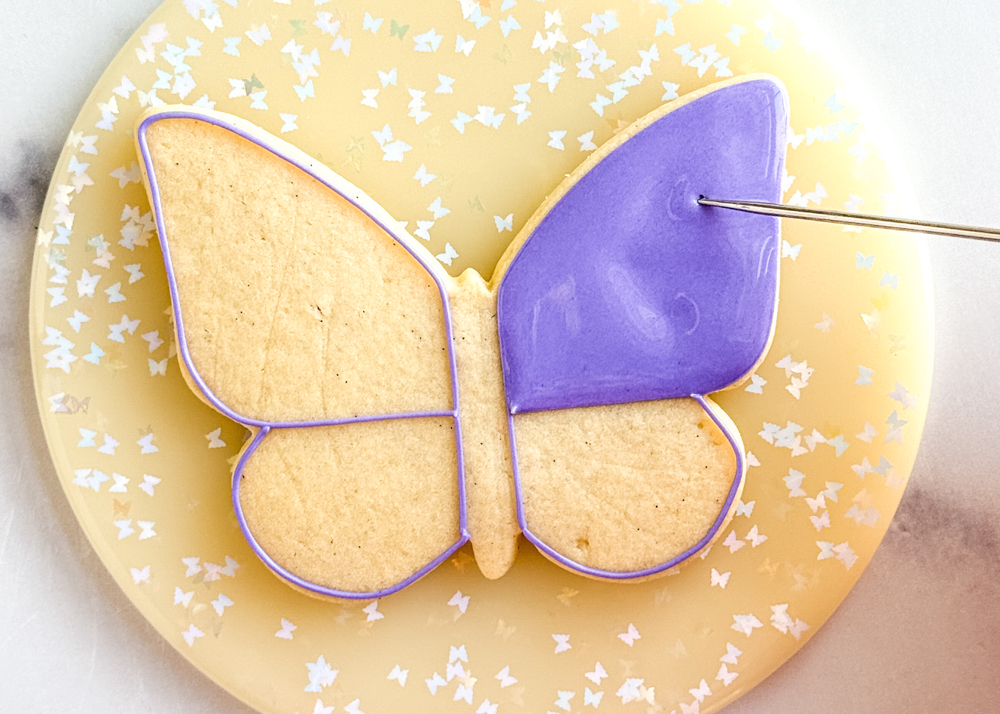
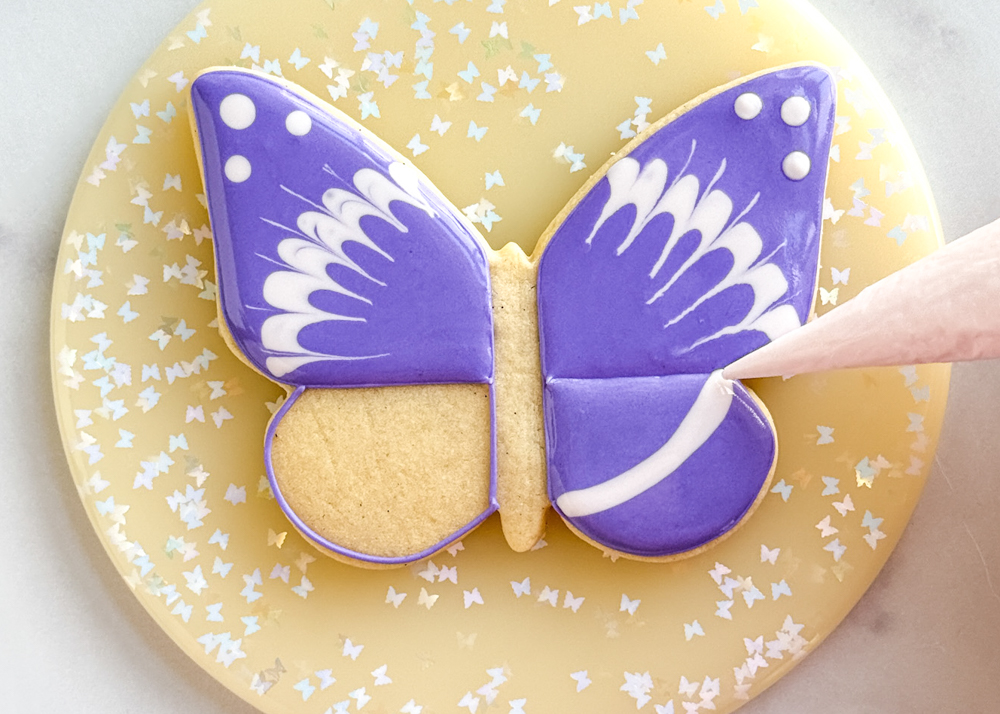
Fill in the top section of the right wing with the purple flood consistency, being careful not to overfill the section. Use your scribe tool to smooth out the icing.
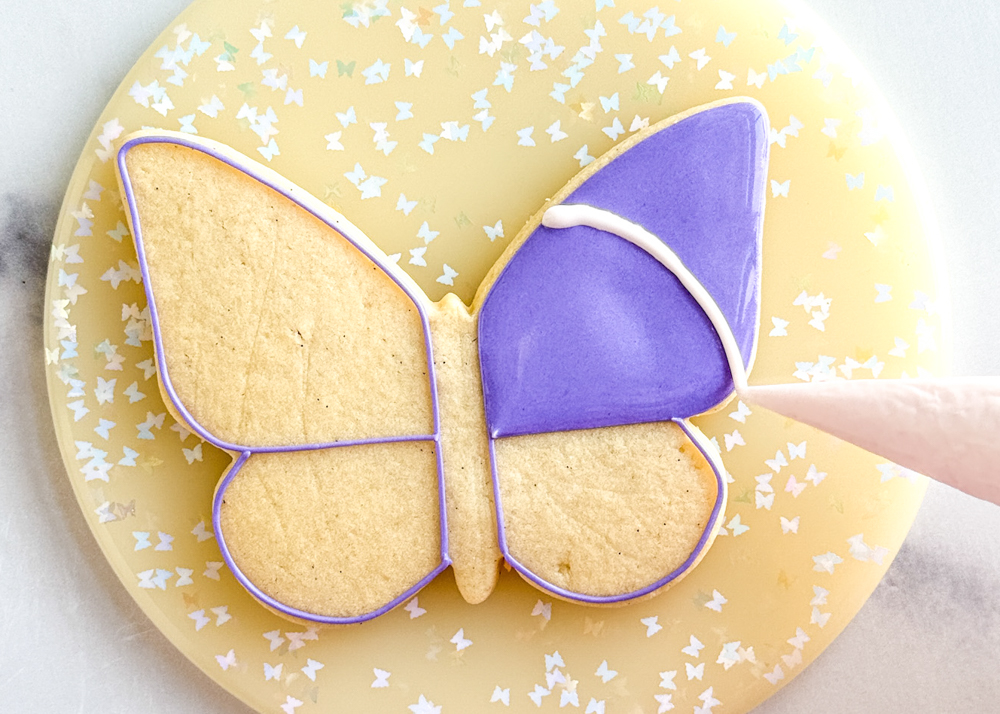
Immediately pipe a double line of the pink flood consistency icing in the middle of the wing, over top of the wet purple icing.
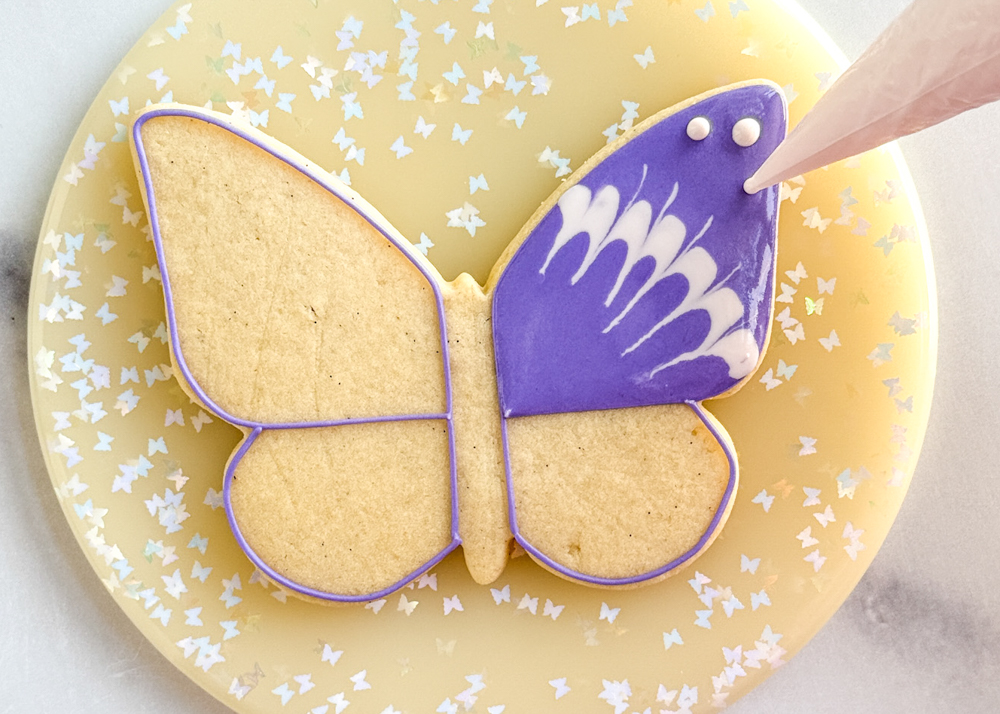
Then pipe three small dots of the pink flood consistency icing on the top corner of the butterfly wing.
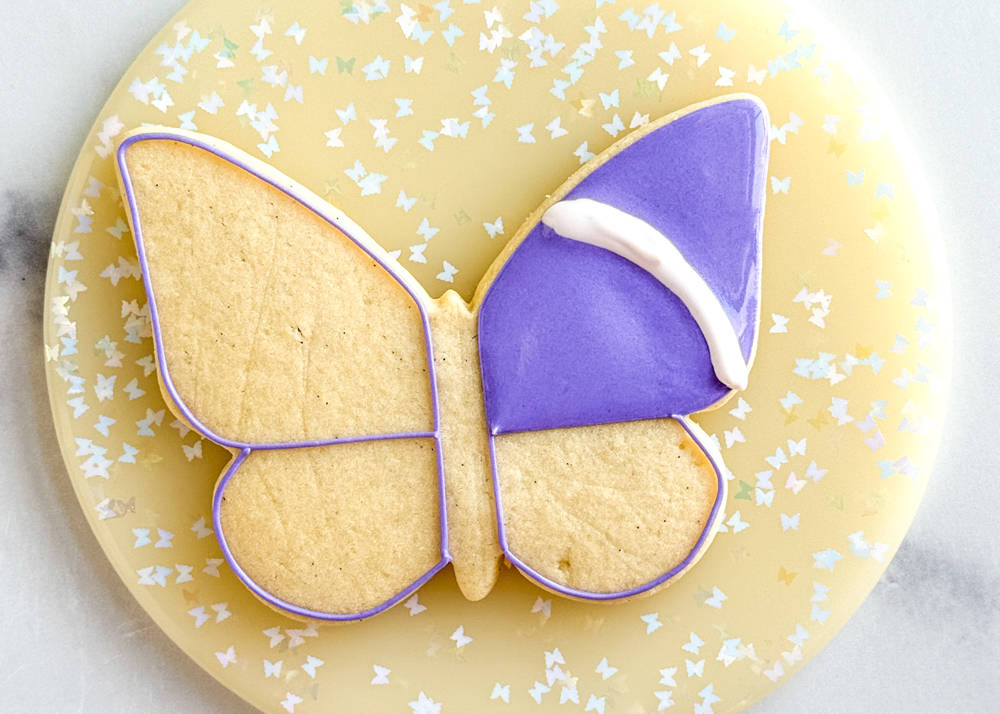
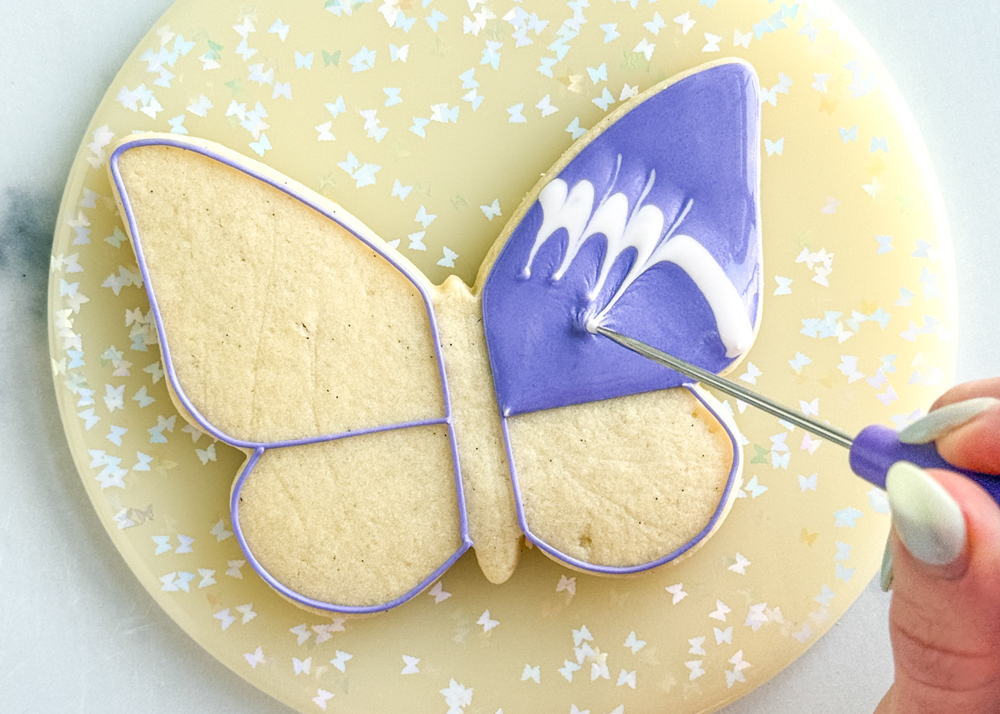
Immediately drag your scribe tool, starting above the pink line, through the line of pink icing, toward the middle of the butterfly.
Repeat this dragging motion 5-6 times, until the desired design is achieved.
Then pipe three small dots of the pink flood consistency icing on the top corner of the butterfly wing.
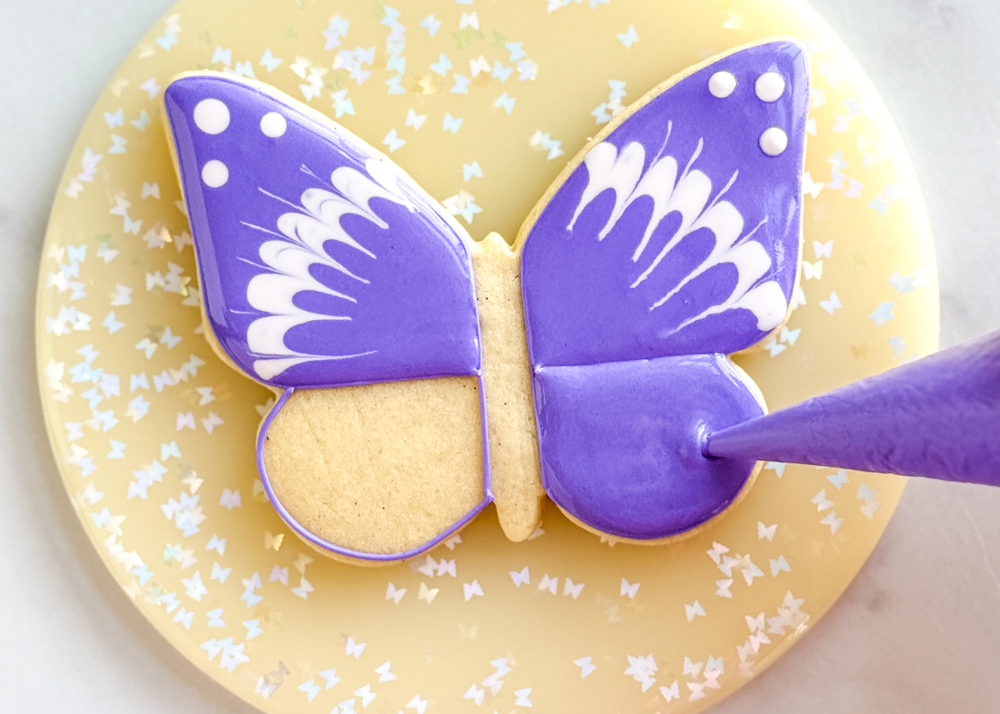
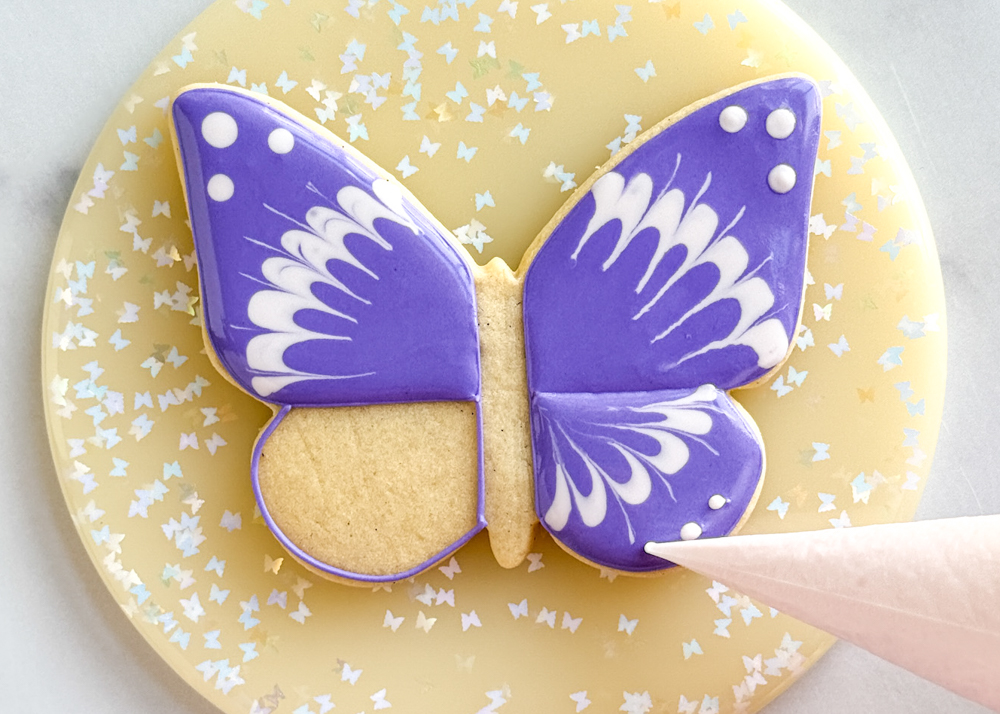
Repeat Steps 3-5 above for the left butterfly wing. Allow these sections to dry for 20-30 minutes before moving onto the next step.
Pro Tip: Try your best to recreate the same design on the opposite wing. However, accept that they will be different and that wet-on-wet designs are particularly challenging and almost never turn out exactly alike. The good news is nature isn’t perfectly identical either!
Once the upper sections of the butterfly wings have dried, repeat steps 3-5 for the bottom sections.
Allow these sections to dry for 20-30 minutes before moving onto the next step.
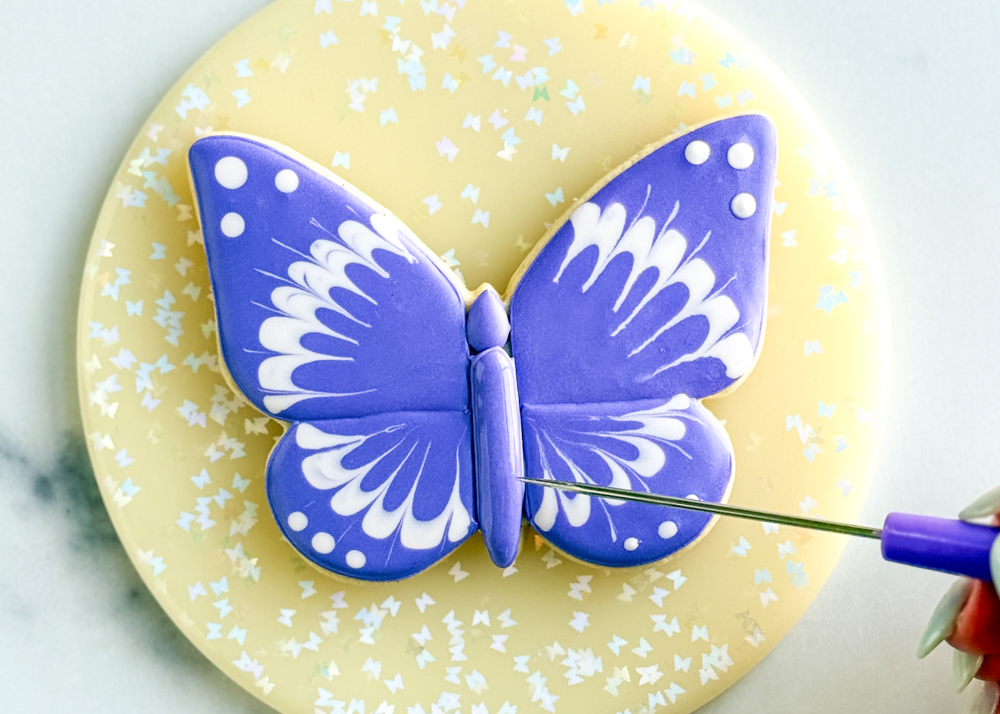
First, pipe a line on the lower section of each wing.
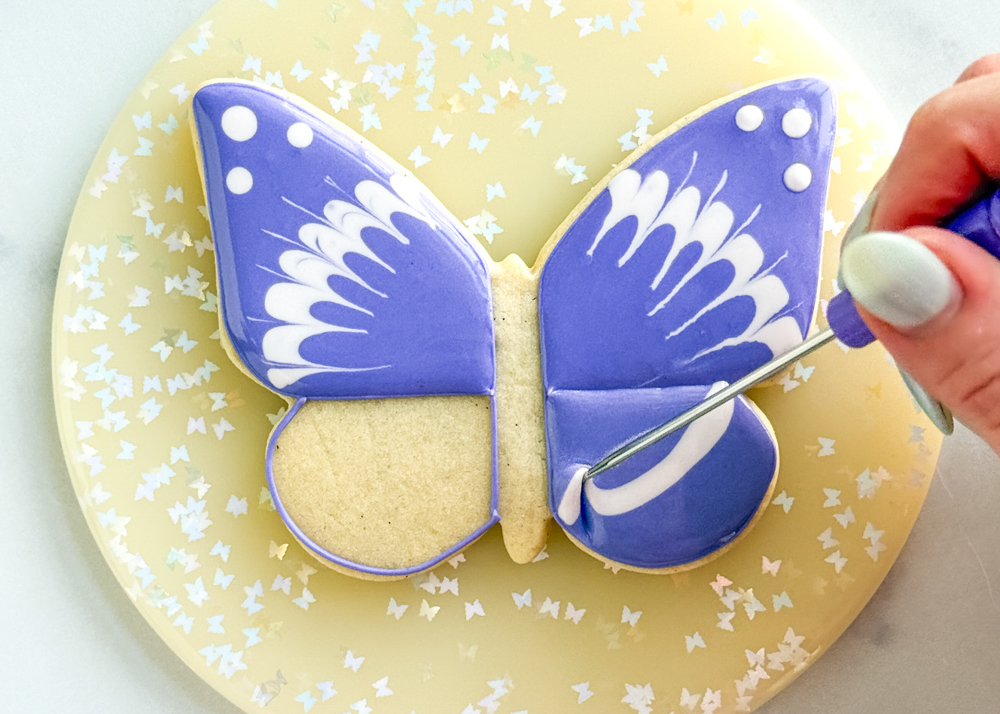
Drag your scribe tool or toothpick through the line toward the center of the butterfly 5-6 times.
Add additional dots and details as desired.

Using the purple outline consistency icing, pipe a small dot for the butterfly’s head. Smooth out the icing with your scribe tool. Allow this section to dry for 5-10 minutes before moving onto the next step.
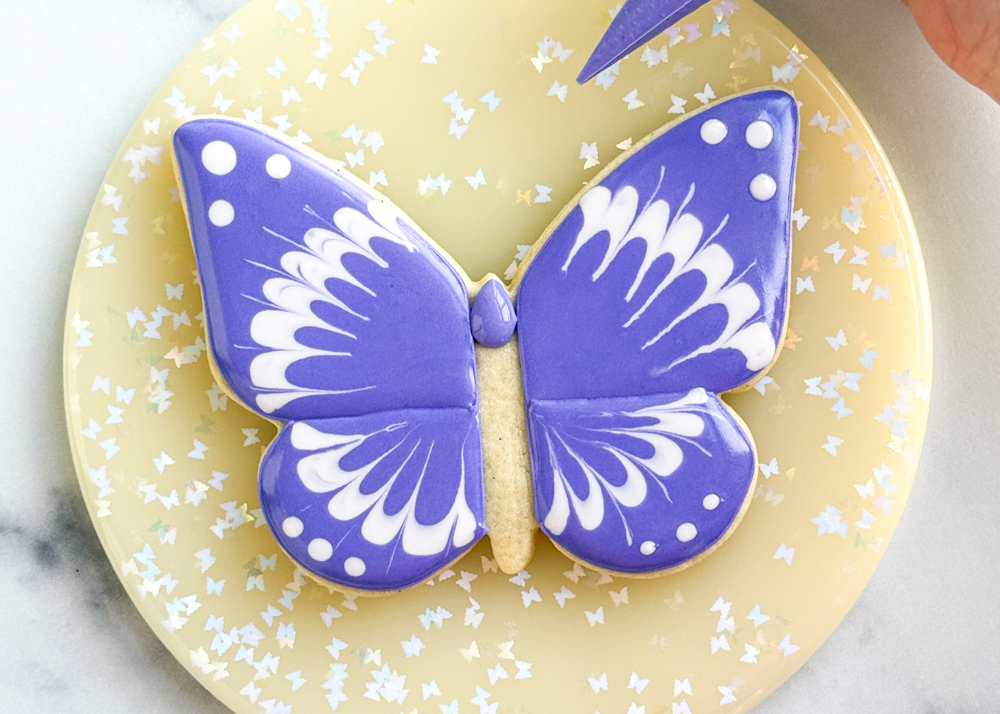
Using the purple outline consistency icing, outline the shape of the butterfly’s body. Add a squiggle of icing in the middle of this section.
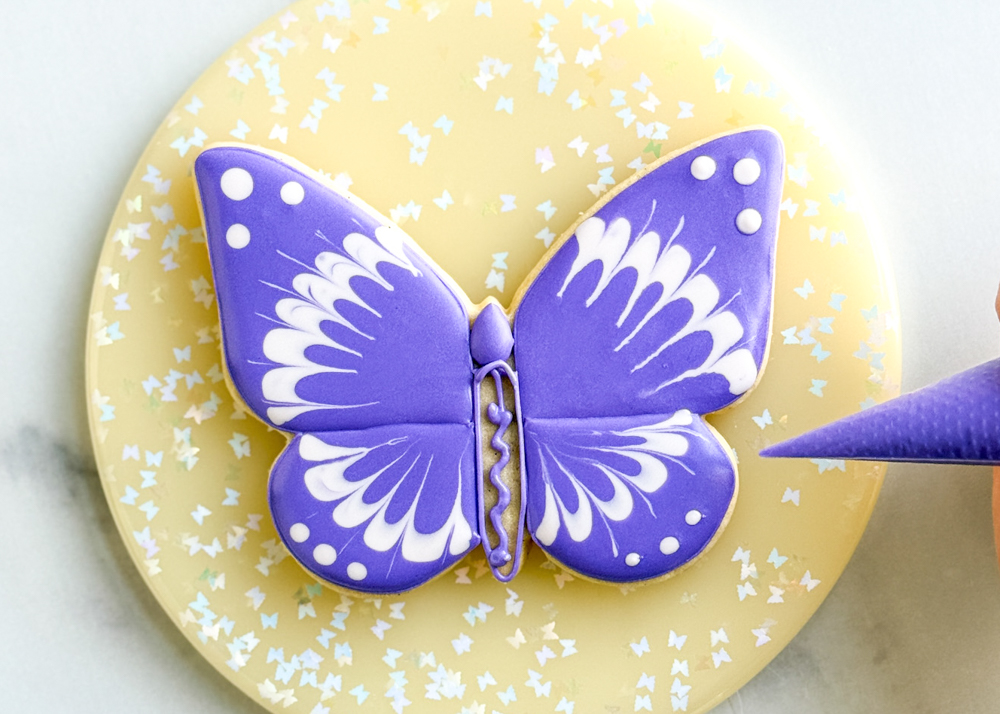
After 1-2 minutes, fill in this section with the purple outline consistency icing. Smooth out the icing with your scribe tool. Allow this section to dry for 5-10 minutes before moving onto the next step.
Pro Tip: Small sections like the body of the butterfly are prone to flood icing cratering. It is best practice to add a squiggle of outline consistency icing and use the outline consistency icing to fill in and manipulate with your scribe tool to maintain the height of the icing as it dried.
Recipe Note
Cookies decorated by Laura Luk of Butterfly Bakes Atlanta.
